User Guide
A step-by-step guide to setting up your ESPTransit departure board — no programming required.
1. Get a Board
You'll need one of the supported ESP32-P4 boards. They're available on AliExpress and ship with everything you need — just a USB-C cable and the board.
2. Flash the Firmware
Open the Web Flasher in a Chromium-based browser (Chrome, Edge, Brave — not Firefox or Safari), connect your board via USB-C, and follow the on-screen instructions.
That's it — no build tools, no command line.
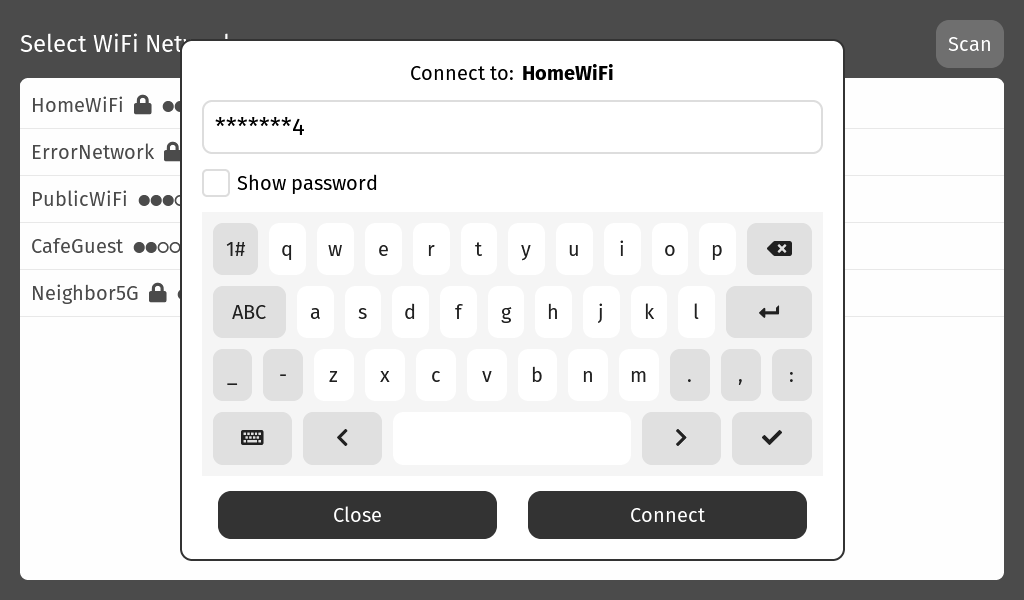
3. Connect to WiFi
After flashing, the board reboots into the WiFi Setup screen:

- The board scans for nearby WiFi networks and lists them on screen
- Tap your network
- Enter the password using the on-screen keyboard
- The board connects and saves the credentials
Tip
The WiFi credentials are saved on the device. You only need to do this once unless you reset the board or change networks.
4. Choose a Station
After connecting to WiFi, the Station Search screen appears:
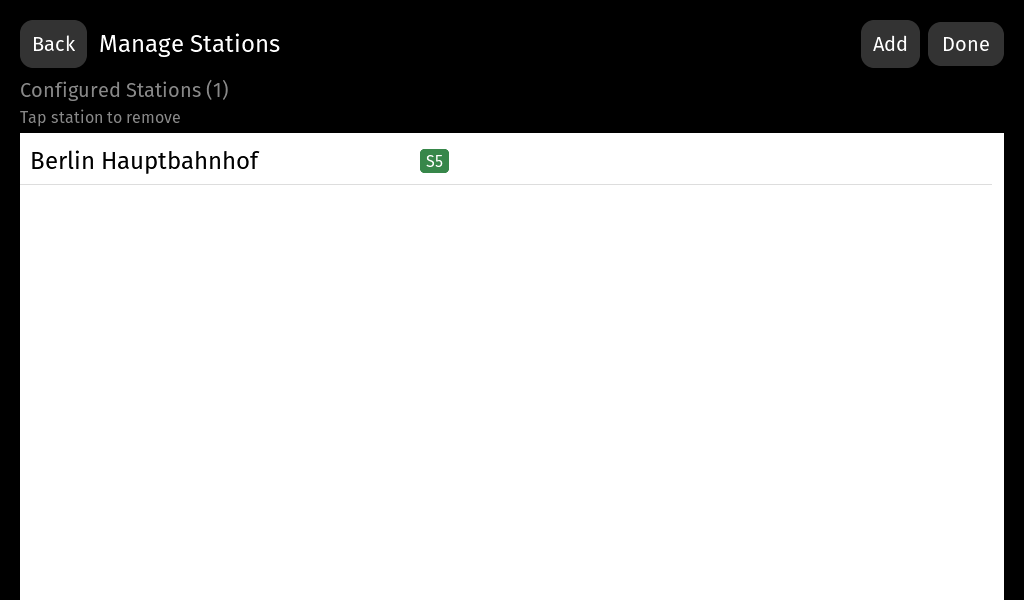
- Search for your departure station by name
- Select it from the results
- The board saves your selection and starts showing departures
5. Done!
Your departure board is now running. It shows real-time departures from the BVG API (Berlin public transit) via ESPTransit-Server.
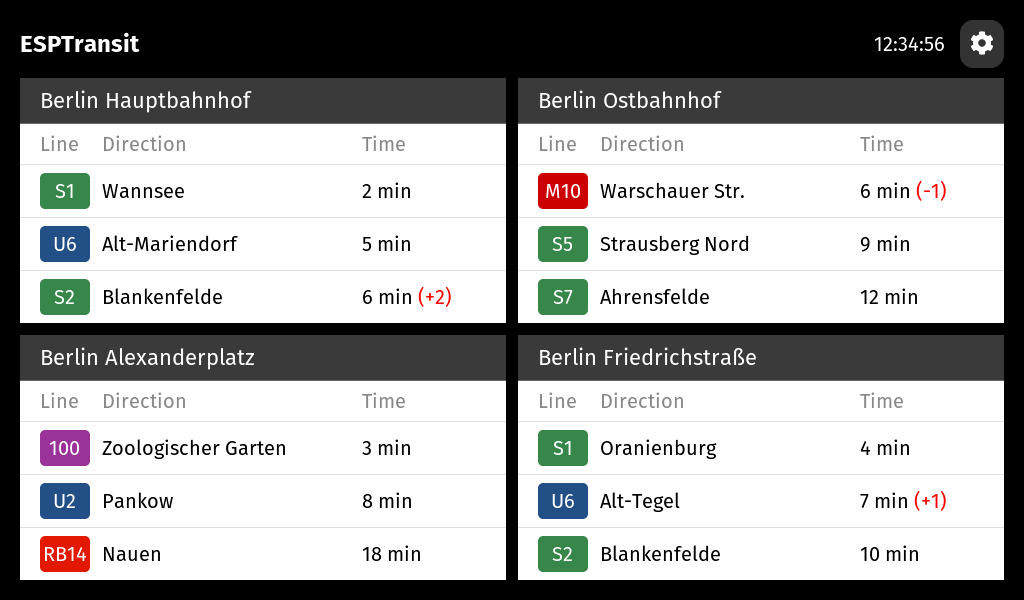
The display updates automatically. Configuration is saved to flash and persists across reboots — just power cycle and it picks up where it left off.
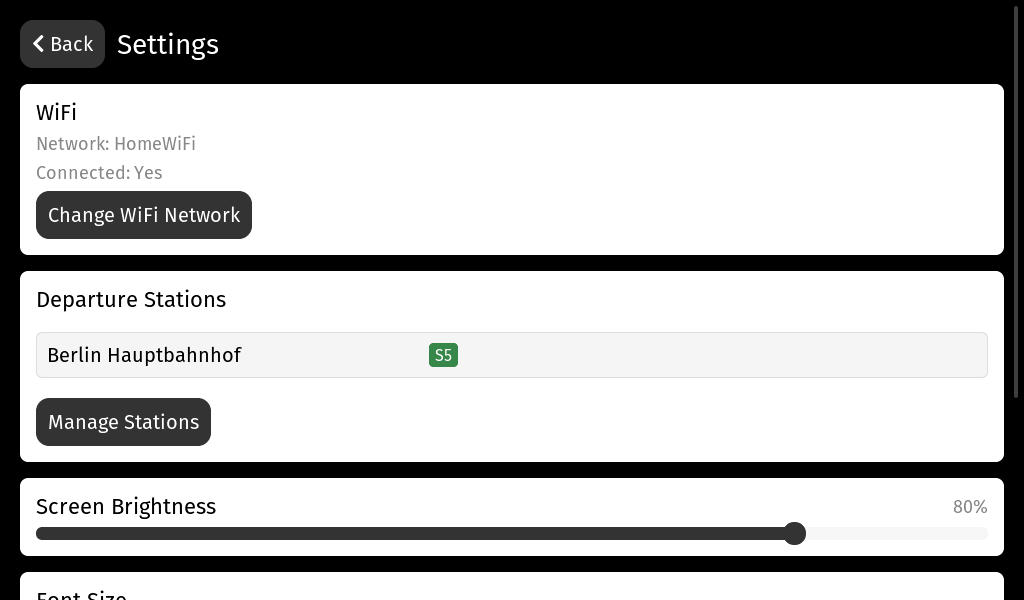
Changing Settings
Tap anywhere on the departures display to open the Settings screen, where you can:
- Add more stations — monitor up to 4 stations, optionally in split-screen mode
- Change WiFi — connect to a different network
- Adjust brightness — control the display backlight level
- Rotate the display — 0, 90, 180, or 270 degrees to match how you've mounted the board
- Open the debug screen — view device info and diagnostics
Troubleshooting
The board doesn't show up when I plug it in : Make sure you're using a USB-C cable that supports data (not charge-only). Try a different cable or USB port.
WiFi connection fails : Double-check the password. The board only supports 2.4 GHz networks — 5 GHz networks won't appear in the scan.
No departures are showing : Check that the board has internet access. The departure data comes from an online API, so the board needs a working internet connection.
I want to start over : Re-flash the firmware using the Web Flasher with the "Erase all data" checkbox enabled. This resets all settings (station, rotation, brightness, etc.) to defaults. Note that WiFi credentials are stored on the companion ESP32-C6 chip and cannot be erased this way — to change WiFi networks, use the Settings screen.